how to assemble flower wall?
To assemble a flower wall, start by gathering the materials you will need, such as a sturdy backdrop, floral foam or chicken wire, and a variety of fresh or artificial flowers. Attach the floral foam or chicken wire to the backdrop securely, ensuring it is evenly distributed. If using floral foam, soak it in water beforehand to keep the flowers hydrated.
Next, begin arranging the flowers on the backdrop, starting from the bottom and working your way up. Use a mix of different flower types, colors, and sizes to create a visually appealing design. Trim the stems of the flowers as needed and insert them into the foam or weave them through the chicken wire.
Continue adding flowers until the entire backdrop is covered, making sure to fill any gaps or empty spaces. Step back occasionally to assess the overall look and make adjustments as necessary. Once you are satisfied with the arrangement, secure any loose flowers or stems with floral wire or hot glue.
Finally, hang or prop up the flower wall in the desired location, ensuring it is stable and secure. Consider adding additional decorative elements, such as greenery or ribbons, to enhance the overall aesthetic.
1、 Selecting and preparing the base for the flower wall
To assemble a flower wall, you will need to follow a few steps. The first step is selecting and preparing the base for the flower wall. This is an important step as it will provide the foundation for your flower wall and ensure its stability.
First, you will need to decide on the type of base you want to use. There are several options available, including a wooden frame, a metal grid, or a foam board. Each option has its own advantages and disadvantages, so choose the one that best suits your needs.
Once you have selected the base, you will need to prepare it for the flowers. If you are using a wooden frame, make sure it is sturdy and secure. Sand down any rough edges and apply a coat of paint or varnish to protect it from moisture.
If you are using a metal grid, make sure it is clean and free from any rust or sharp edges. You may need to use pliers to bend any protruding wires to ensure they do not damage the flowers.
If you are using a foam board, make sure it is thick enough to hold the weight of the flowers. You may need to reinforce it with additional foam or plywood to ensure its stability.
Once the base is prepared, you can start attaching the flowers. Use floral wire or hot glue to secure the flowers to the base. Start from the bottom and work your way up, making sure to cover the entire surface.
Consider using a variety of flowers in different colors and sizes to create a visually appealing and dynamic flower wall. You can also add greenery or other decorative elements to enhance the overall look.
Remember to water the flowers regularly to keep them fresh and vibrant. If you are using artificial flowers, make sure to clean them periodically to remove any dust or dirt.
In conclusion, selecting and preparing the base for the flower wall is an essential step in assembling a beautiful and sturdy flower wall. Take your time to choose the right base and ensure it is properly prepared before attaching the flowers.
2、 Choosing and arranging the flowers for the wall
To assemble a flower wall, you will need to follow a few steps. First, you need to choose and arrange the flowers for the wall. This is a crucial step as it determines the overall look and feel of the wall.
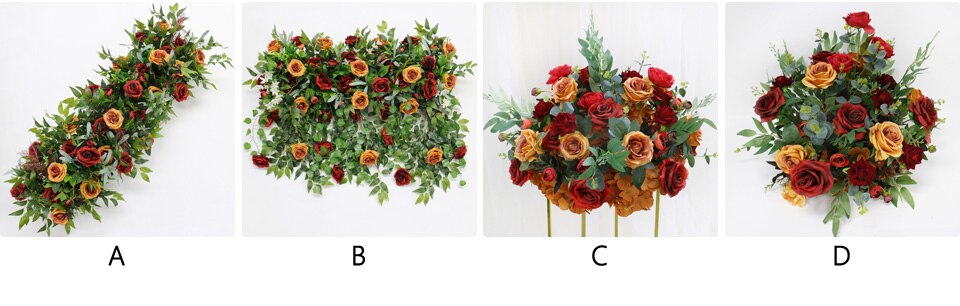
When choosing flowers, consider the color scheme and theme of the event or space where the flower wall will be placed. You can opt for a monochromatic look with flowers of the same color or create a vibrant display with a mix of different hues. It's also important to select flowers that are in season and will last throughout the event.
Once you have chosen the flowers, you can start arranging them. Begin by attaching a sturdy base to the wall, such as a wooden frame or wire mesh. This will provide support for the flowers and ensure they stay in place. You can then attach floral foam or oasis to the base, which will hold the stems of the flowers securely.
Next, start placing the flowers onto the foam, starting from the bottom and working your way up. Use a mix of different flower types and sizes to create depth and texture. You can also incorporate greenery and foliage to add volume and fill any gaps.
As you arrange the flowers, step back occasionally to assess the overall look and make any necessary adjustments. It's important to ensure that the flowers are evenly distributed and that there are no bare spots.
Finally, mist the flowers with water to keep them fresh and vibrant. If the flower wall is for an event, make sure to set it up as close to the event time as possible to ensure the flowers stay fresh throughout the occasion.
In conclusion, assembling a flower wall involves choosing and arranging the flowers in a way that complements the desired theme and color scheme. By following these steps, you can create a stunning flower wall that adds beauty and elegance to any space or event.
3、 Attaching the flowers securely to the base
To assemble a flower wall, one of the crucial steps is attaching the flowers securely to the base. This ensures that the flowers stay in place and create a beautiful and cohesive display. Here's a step-by-step guide on how to accomplish this:
1. Start by selecting a sturdy base for your flower wall. This can be a wooden panel, a wire mesh, or even a foam board. Make sure it is large enough to accommodate the desired size of your flower wall.
2. Prepare your flowers by trimming the stems to a suitable length. Remove any excess leaves or thorns that may interfere with the attachment process.
3. Determine the layout and design of your flower wall. Arrange the flowers in a pattern or color scheme that you desire. This will help you visualize the final result and make the attachment process easier.
4. Use a hot glue gun or floral adhesive to attach the flowers to the base. Apply a small amount of glue to the back of each flower and press it firmly onto the base. Hold it in place for a few seconds to ensure a secure bond.
5. Work in sections, starting from one corner and gradually moving across the base. This will help you maintain a consistent pattern and prevent any gaps or unevenness.
6. As you attach the flowers, consider adding some greenery or foliage to enhance the overall look. This can be done by gluing small branches or leaves in between the flowers.
7. Once all the flowers are attached, step back and assess the overall appearance of the flower wall. Make any necessary adjustments or additions to achieve the desired effect.
It's important to note that the latest point of view in flower wall assembly is to consider using alternative attachment methods such as zip ties or floral wire. These methods provide additional stability and allow for easier removal or rearrangement of flowers if needed. Additionally, some flower walls now incorporate artificial flowers or a combination of real and artificial blooms to ensure longevity and reduce maintenance.

4、 Adding foliage and other decorative elements to enhance the wall
To assemble a flower wall, you will need a few key materials and follow a step-by-step process. Here's a guide on how to assemble a flower wall:
1. Gather the materials: You will need a sturdy base, such as a wooden frame or a wire mesh panel, to attach the flowers. You will also need floral foam or water tubes to keep the flowers hydrated, floral wire or zip ties to secure the flowers, and a variety of fresh or artificial flowers and foliage.
2. Prepare the base: If using a wooden frame, make sure it is securely anchored to a wall or freestanding structure. If using a wire mesh panel, attach it to a stable frame or wall. Ensure the base is clean and free from any debris.
3. Attach the floral foam or water tubes: If using floral foam, soak it in water until fully saturated, then attach it to the base using floral wire or zip ties. If using water tubes, fill them with water and attach them to the base.
4. Start with the foliage: Begin by adding foliage to the base, starting from the bottom and working your way up. Use a mix of different types of foliage to create depth and texture. Secure the foliage using floral wire or zip ties.
5. Add the flowers: Once the foliage is in place, start adding the flowers. Begin with larger blooms and place them evenly throughout the wall. Then, fill in the gaps with smaller flowers. Secure each flower using floral wire or zip ties.
6. Arrange the flowers: Take a step back and assess the arrangement. Make any necessary adjustments to ensure a balanced and visually appealing display. Consider the color palette, texture, and height variations.
7. Adding foliage and other decorative elements: To enhance the flower wall, consider adding additional foliage, such as trailing vines or cascading greenery. You can also incorporate other decorative elements like ribbons, fairy lights, or butterflies to add a whimsical touch.
Remember to regularly mist the flowers to keep them fresh and hydrated. If using artificial flowers, periodically dust them to maintain their appearance. With proper care, your flower wall will be a stunning focal point for any event or space.