
how to put up a flower wall?

To put up a flower wall, start by selecting the type of flowers you want to use. Then, gather the necessary materials such as a sturdy frame or backdrop, chicken wire or floral foam, and floral wire or zip ties. Attach the chicken wire or floral foam to the frame securely. Next, prepare the flowers by trimming the stems and removing any excess leaves. Begin attaching the flowers to the chicken wire or floral foam using floral wire or zip ties. Start from the bottom and work your way up, ensuring that the flowers are tightly secured. Continue adding flowers until the entire wall is covered. Finally, water the flowers regularly to keep them fresh and vibrant.
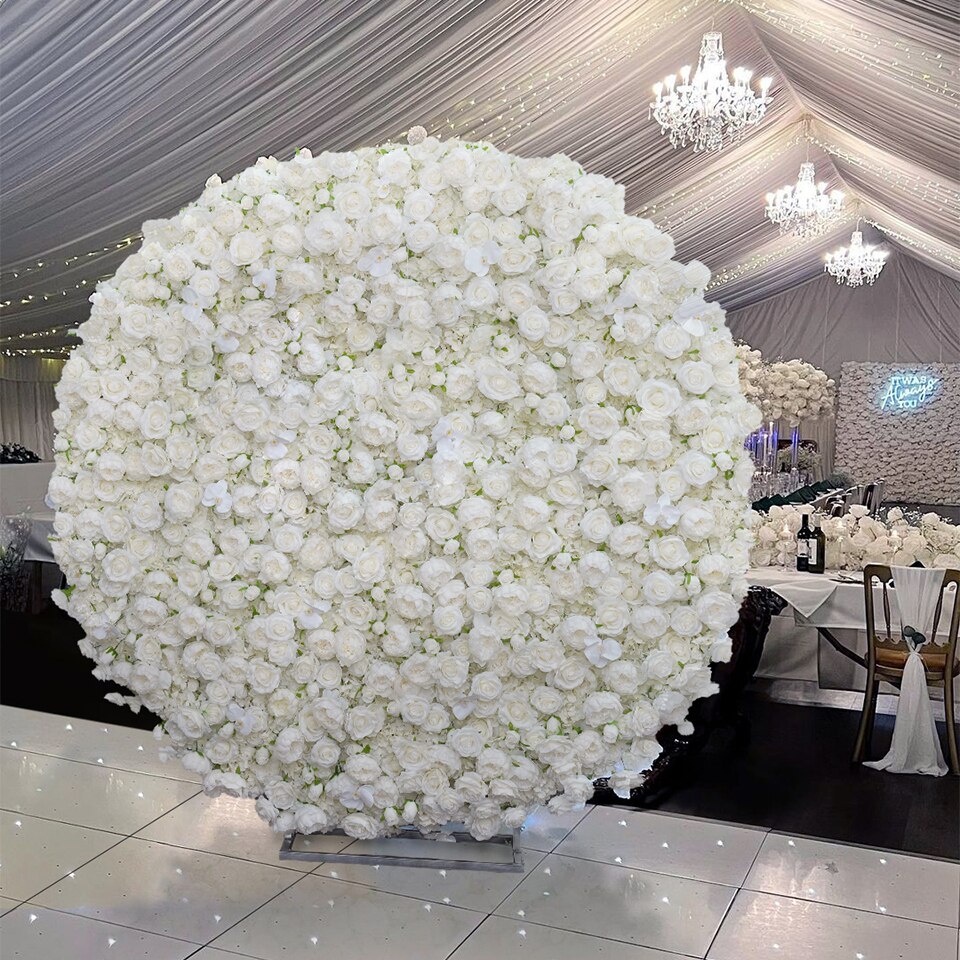
1、 Selecting the right flowers and foliage for your wall
Selecting the right flowers and foliage for your flower wall is an essential step in creating a stunning and visually appealing display. The choice of flowers and foliage will greatly impact the overall look and feel of your wall, so it's important to consider a few key factors.
Firstly, consider the theme or color scheme you want to achieve. Are you looking for a vibrant and colorful wall, or a more subtle and elegant display? This will help guide your flower selection. You can choose a variety of flowers in different shades and sizes to create depth and visual interest.
Additionally, consider the season and availability of flowers. Opting for flowers that are in season will not only ensure their freshness but also reduce costs. It's also worth considering the durability of the flowers you choose, as some may wilt or fade more quickly than others.
When it comes to foliage, consider using a mix of different textures and shades of green to add depth and contrast to your wall. Foliage such as eucalyptus, ferns, and ivy can provide a lush and natural backdrop for your flowers.
Lastly, consider the size and location of your flower wall. If you're creating a large-scale installation, you may want to choose flowers and foliage that are more robust and can withstand the elements. For smaller walls, delicate flowers and foliage can create a more intricate and detailed display.
In conclusion, selecting the right flowers and foliage for your flower wall is crucial in creating a visually stunning and cohesive display. Consider the theme, season, availability, durability, and size of your wall to make the best choices.
2、 Preparing the wall surface for installation
Preparing the wall surface for installation is an essential step when putting up a flower wall. This ensures that the wall is clean, smooth, and ready to hold the flowers securely. Here is a step-by-step guide on how to prepare the wall surface for installing a flower wall:
1. Clean the wall: Start by removing any dirt, dust, or debris from the wall surface. Use a damp cloth or sponge to wipe down the entire area. This will create a clean canvas for the flower wall installation.
2. Repair any damages: Inspect the wall for any cracks, holes, or imperfections. Fill in any gaps with spackling paste or putty, and smooth it out with a putty knife. Allow it to dry completely before moving on to the next step.
3. Sand the wall: If the wall has any rough or uneven areas, lightly sand them down using fine-grit sandpaper. This will create a smooth surface for the flower wall to adhere to.
4. Prime the wall: Apply a coat of primer to the entire wall surface. This will help the flower wall adhesive to adhere better and ensure a long-lasting installation. Choose a primer that is suitable for the type of wall material you have.
5. Let the primer dry: Allow the primer to dry completely according to the manufacturer's instructions. This usually takes a few hours, but it's best to wait overnight to ensure it is fully cured.
By following these steps, you will have a well-prepared wall surface that is ready for the installation of a flower wall. It is important to note that the latest point of view emphasizes the use of eco-friendly and sustainable materials for flower walls, such as biodegradable adhesives and recycled wall panels. This ensures that the installation is not only visually appealing but also environmentally conscious.

3、 Creating a sturdy framework for the flower wall
Creating a sturdy framework for the flower wall is an essential step in putting up a flower wall. This framework will provide the structure and support needed to hold the flowers in place and ensure that the wall remains stable. Here is a step-by-step guide on how to create a sturdy framework for your flower wall:
1. Determine the size and location of your flower wall. Measure the area where you want to install the wall and decide on the dimensions.
2. Choose a material for the framework. Common options include wood, metal, or PVC pipes. Consider the weight of the flowers and the overall aesthetic you want to achieve.
3. Cut the material to the desired length and height. Use a saw or appropriate cutting tool to create the necessary pieces for the framework.
4. Assemble the framework. Connect the pieces together using screws, nails, or connectors. Ensure that the structure is secure and stable.
5. Attach the framework to the wall or freestanding structure. Use screws or brackets to secure the framework in place. Make sure it is level and properly aligned.
6. Add additional support if needed. Depending on the size and weight of the flower wall, you may need to reinforce the framework with additional braces or supports.
7. Once the framework is in place, you can start attaching the flowers. Use floral wire or zip ties to secure the flowers to the framework. Start from the bottom and work your way up, layering the flowers to create a lush and full look.
Remember to consider the latest point of view when creating your flower wall framework. Sustainable and eco-friendly materials are becoming increasingly popular, so consider using recycled or biodegradable materials for your framework. Additionally, incorporating technology such as LED lights or irrigation systems can add a modern touch to your flower wall.

4、 Attaching the flowers and foliage to the framework
To put up a flower wall, you will need to follow a few steps. The first step is to create a sturdy framework to support the weight of the flowers and foliage. This can be done using a wooden or metal frame, depending on your preference and the size of the wall. Make sure the frame is securely attached to the wall or freestanding structure.
Once the framework is in place, you can start attaching the flowers and foliage. Begin by selecting a variety of fresh flowers and greenery that complement each other in terms of color and texture. You can choose to use real flowers or opt for artificial ones, depending on your budget and preferences.
To attach the flowers and foliage, you can use floral wire or hot glue. If using floral wire, wrap it around the stems of the flowers and secure it to the framework. If using hot glue, apply a small amount to the back of each flower or foliage piece and press it firmly onto the framework. Make sure to distribute the flowers and foliage evenly across the wall to create a balanced and visually appealing arrangement.
As for the latest point of view, there has been a growing trend in using pre-made flower wall panels. These panels are made of artificial flowers and foliage that are already attached to a sturdy backing. They can be easily hung or attached to the framework, saving time and effort in the installation process. Additionally, these panels offer a wide range of design options and can be reused for multiple events. However, if you prefer the natural beauty and fragrance of real flowers, the traditional method of attaching them individually is still a popular choice.


