how to make wood wedding backdrop?
To make a wood wedding backdrop, you will need several wooden planks or boards of your desired size and thickness. Start by measuring the area where you want to set up the backdrop and determine the dimensions accordingly. Next, gather the wooden planks and arrange them in the desired pattern or design. You can choose to leave the wood in its natural state or paint/stain it to match your wedding theme. Once you have the arrangement finalized, use screws or nails to secure the planks together. Make sure to reinforce the structure by adding additional support beams or braces if needed. Finally, set up the backdrop at your wedding venue by attaching it to a sturdy frame or using stands for stability. Decorate the backdrop with flowers, greenery, or other decorative elements to enhance its visual appeal.
1、 Designing the Wood Wedding Backdrop
Designing the Wood Wedding Backdrop
Creating a wood wedding backdrop adds a rustic and charming touch to any wedding ceremony or reception. It provides a beautiful focal point for the couple and their guests, and can be customized to match the overall theme and style of the wedding. Here are some steps to consider when designing a wood wedding backdrop:
1. Determine the size and shape: Measure the space where the backdrop will be placed and decide on the dimensions. Consider the height, width, and depth of the backdrop to ensure it fits the space appropriately.
2. Choose the type of wood: Select a type of wood that suits the desired aesthetic. Popular choices include reclaimed barn wood, pallet wood, or even driftwood for a beach-themed wedding. Each type of wood will provide a unique texture and color to the backdrop.
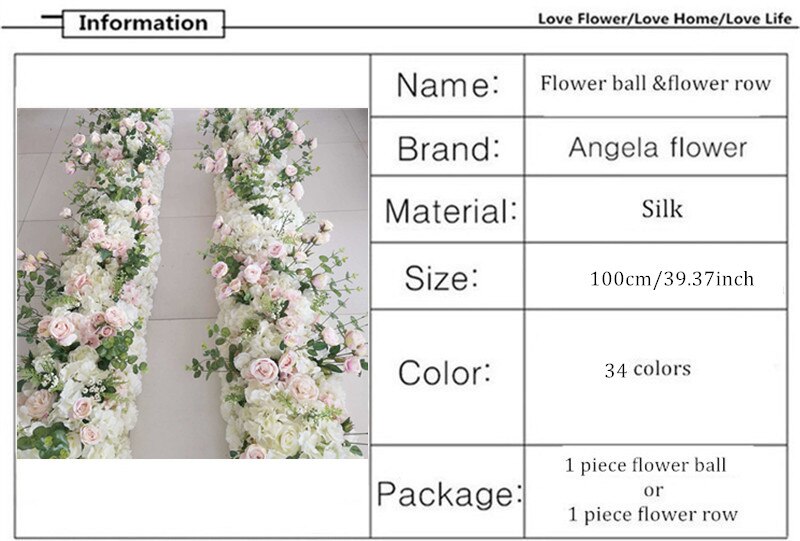
3. Plan the design: Sketch out the design of the backdrop, taking into account any additional elements such as flowers, greenery, or lighting. Consider incorporating different patterns, shapes, or even personalized monograms to make the backdrop truly unique.
4. Gather the materials: Once the design is finalized, gather all the necessary materials. This may include the wood, nails, screws, paint or stain, and any additional decorative elements.
5. Build the frame: Start by constructing the frame of the backdrop using the selected wood. Ensure that it is sturdy and secure, as it will need to support any additional elements that will be added later.
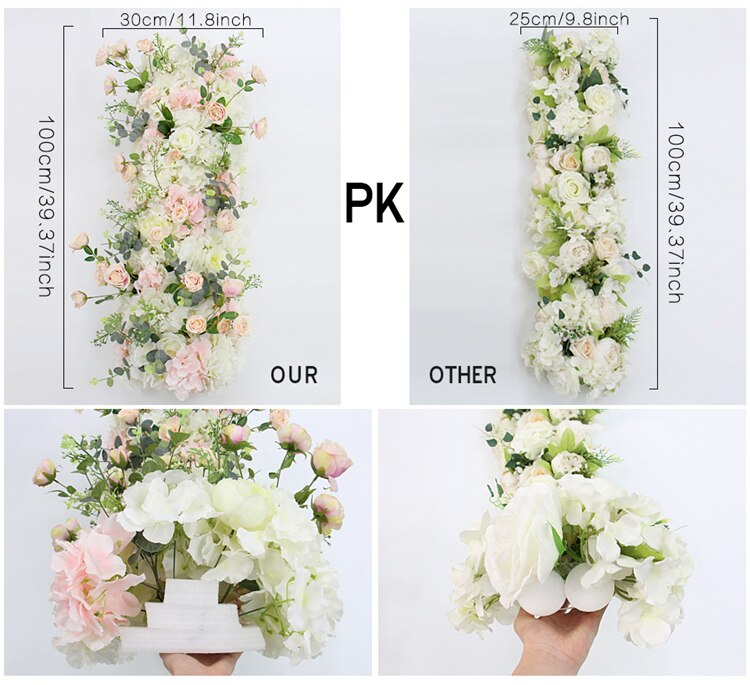
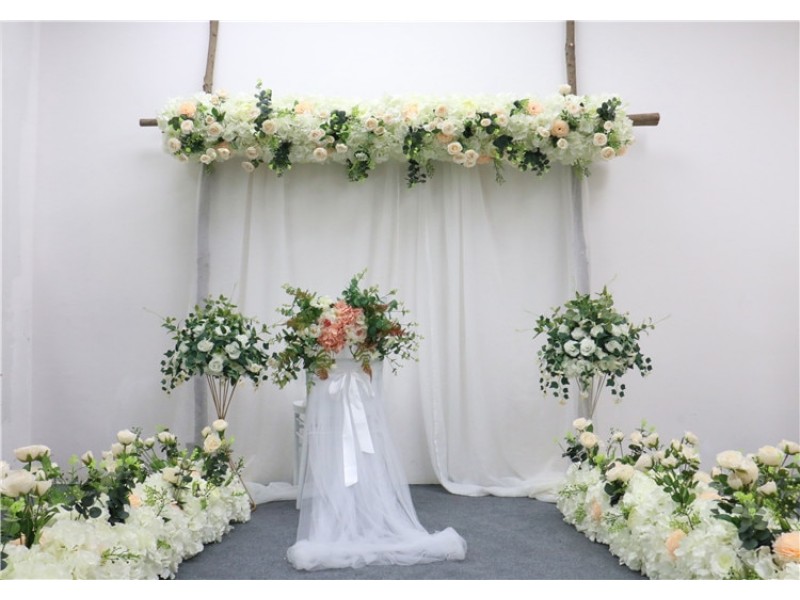
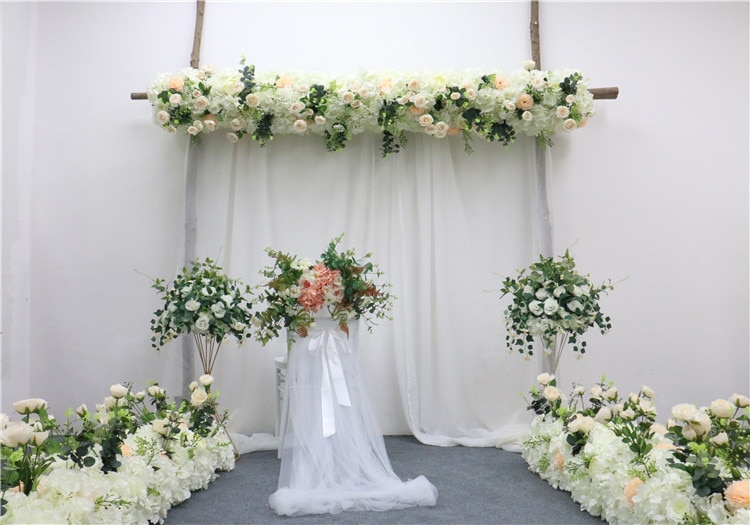
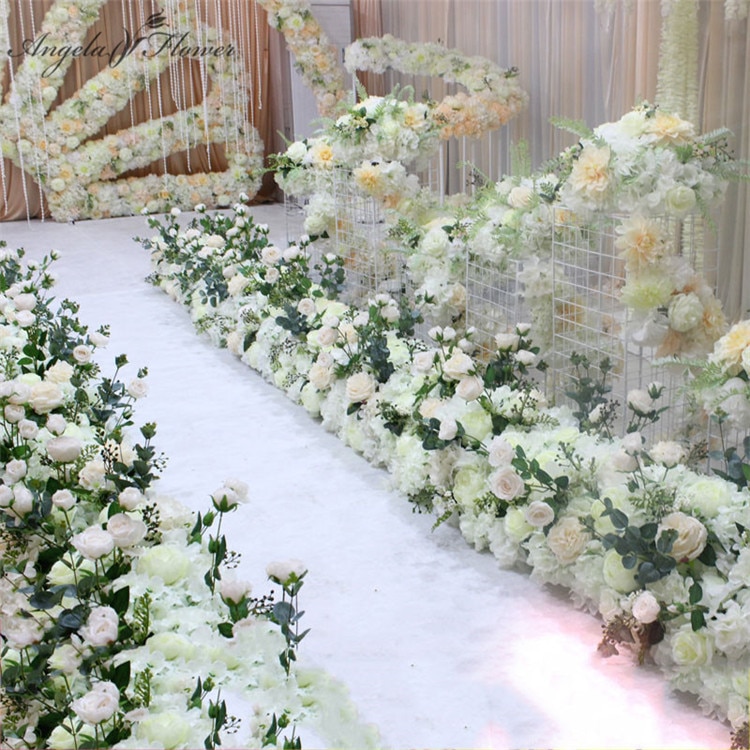
6. Add decorative elements: Once the frame is complete, begin adding the decorative elements such as flowers, greenery, or lighting. These elements can be attached directly to the wood or hung from the top of the backdrop.
7. Paint or stain: If desired, paint or stain the wood to match the wedding color scheme or theme. This step can be done before or after adding the decorative elements, depending on the desired effect.
8. Set up the backdrop: Finally, set up the wood wedding backdrop at the desired location. Ensure that it is securely anchored and positioned for optimal visibility and aesthetics.
In conclusion, designing a wood wedding backdrop involves careful planning, selecting the right materials, and incorporating personalized elements. By following these steps, couples can create a stunning and memorable backdrop that adds a touch of rustic elegance to their special day.
2、 Selecting the Right Type of Wood
To make a wood wedding backdrop, the first step is to select the right type of wood. Choosing the appropriate wood is crucial as it will determine the overall look and durability of the backdrop. Here are some factors to consider when selecting the right type of wood for your wedding backdrop:
1. Aesthetic Appeal: Consider the theme and style of your wedding. Different types of wood have distinct colors, grains, and textures. For a rustic or vintage wedding, reclaimed or weathered wood can add character, while a sleek and modern wedding may call for a smoother and more polished wood.
2. Durability: Ensure that the wood you choose is sturdy and can withstand the elements if you plan to have an outdoor wedding. Hardwoods like oak, maple, or walnut are known for their strength and durability.
3. Sustainability: With increasing environmental concerns, opting for sustainable wood is a responsible choice. Look for wood that is certified by organizations like the Forest Stewardship Council (FSC), which ensures that the wood is sourced from responsibly managed forests.
4. Budget: Consider your budget when selecting the wood. Some types of wood, like mahogany or teak, can be more expensive, while others like pine or plywood are more affordable options.
5. Ease of Use: Depending on your DIY skills, choose wood that is easy to work with. Softwoods like pine or cedar are generally easier to cut, shape, and assemble.
It is important to stay updated with the latest trends and innovations in wood selection. For example, bamboo is gaining popularity as a sustainable and versatile option for wedding backdrops. It is lightweight, durable, and has a unique aesthetic appeal.
Remember to always consult with professionals or experienced woodworkers for advice and guidance when selecting the right type of wood for your wedding backdrop.
3、 Preparing and Cutting the Wood Pieces
To make a wood wedding backdrop, the first step is to prepare and cut the wood pieces. This is an essential part of the process as it sets the foundation for the entire backdrop. Here's a step-by-step guide on how to do it:
1. Measure and plan: Start by measuring the area where you want to set up the backdrop. This will help you determine the size and number of wood pieces you'll need. Consider the height, width, and any additional design elements you want to incorporate.
2. Choose the wood: Select a type of wood that suits your aesthetic preferences and budget. Popular choices include plywood, reclaimed wood, or pallet wood. Ensure the wood is sturdy and free from any defects or damage.
3. Gather the necessary tools: You'll need a circular saw or a miter saw to cut the wood pieces to the desired dimensions. Additionally, have a measuring tape, pencil, and safety equipment such as goggles and gloves.
4. Mark and cut the wood: Use the measuring tape and pencil to mark the measurements on the wood pieces. Double-check the measurements before cutting to avoid any mistakes. Carefully cut the wood using the saw, following the marked lines.
5. Sand the edges: After cutting, use sandpaper to smooth out any rough edges or splinters. This step is crucial to ensure the safety of anyone who will be handling the backdrop.
6. Optional: Add design elements: If desired, you can add additional design elements to the wood pieces, such as engraving, painting, or staining. This will enhance the overall look of the backdrop and tie it in with your wedding theme.
Remember to take breaks and work in a well-ventilated area. Safety should always be a priority when working with tools and wood.
4、 Assembling and Securing the Backdrop Structure
To make a wood wedding backdrop, one of the crucial steps is assembling and securing the backdrop structure. This process ensures that the backdrop is stable and can withstand any movement or external factors during the wedding ceremony. Here is a step-by-step guide on how to assemble and secure a wood wedding backdrop:
1. Measure and cut the wooden boards: Start by measuring the desired height and width of the backdrop. Use a saw to cut the wooden boards according to these measurements. Ensure that the boards are of equal length to maintain symmetry.
2. Create the frame: Lay out the cut boards on a flat surface to form a rectangular frame. Use screws or nails to attach the boards at the corners, ensuring they are tightly secured. For added stability, consider adding diagonal braces to the corners.
3. Attach the support beams: Measure and cut additional wooden boards to serve as support beams for the backdrop. Attach these beams horizontally across the frame, evenly spaced apart. Secure them with screws or nails.
4. Reinforce the structure: To further strengthen the backdrop, consider adding additional support beams vertically along the frame. This will prevent any sagging or bending of the wood over time.
5. Sand and finish the wood: Once the structure is assembled, sand the wood to smooth out any rough edges or surfaces. Apply a wood finish or paint of your choice to enhance the appearance and protect the wood from moisture or damage.
6. Secure the backdrop: Depending on the venue and location, you may need to secure the backdrop to prevent it from tipping over. Use sandbags or heavy weights at the base of the structure, or consider attaching it to a wall or sturdy surface using brackets or hooks.
It is important to note that the latest point of view in creating a wood wedding backdrop is to prioritize sustainability and eco-friendliness. Consider using reclaimed or repurposed wood for the backdrop, as it reduces the environmental impact and adds a unique touch to the overall design. Additionally, incorporating natural elements such as flowers, greenery, or fabric drapes can enhance the backdrop's aesthetic appeal and create a more organic and romantic atmosphere.